
The image comes from the camera and goes to the computer by USB or memory cards, etc. Now we start to work our magic by editing the photo. Believe me, editing is an art by itself! There are many photo editing programs out there. Some are free: Picasa, GIMP, Photoscape, Paint.net, to name a few. Or you spend a bit and get Adobe's PhotoShop (professional "CS4" or "Elements"), Corel, Light Room, or others. No one program is perfect; it's a matter of personal preference and what the artist is looking to produce.
Now the fun begins. After "cropping" (cutting the photo down to size and removing any unnecessary elements) it's very important to get the right colors. You can see a difference between TJR's before:

And after:

As you can see, not only is the background lighter, but the cuff itself is a more natural silver color and more reflective.
Then the photo will be "re-sized" for the web. For instance, the photos here must be 215 "pixels" wide. So if you have an image 1200 pixels wide your image will get cropped down and you'll probably end up with just the empty space inside a necklace. Not good.
So, here's an example of wicked good editing. You can go from this...
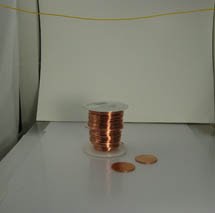
to this without picking up a pair of pliers...

Just kidding! Here's what the photo looked like before editing (you can see the yellow fishing line I used to hang the earrings; I also had to retake the photo here to show the "before" so the light source direction is slightly different):

Editing is can be either be very simple or complicated depending on the photo you start with and what you want to finish with. I don't have enough time to explain all we do: playing with colors, light levels, cropping, re-sizing, etc. The software some members use can take more than a year to learn to use and get good results. My purpose for this post (and last Saturday's) was to give customers a bit of the basics so they can understand, and appreciate, some of what we SATeam members go through to create a piece and present it on the web.
13 comments:
Great post again, Sue!!
How did we ever survive before digital cameras. Thanks for the great tips.
I second the comment about digital cameras Michele! Good job on the post Sue!
You said it, Michele! I'm not surelly sure how survived before digital cameras...the same can be said of microwaves! heheh But really, the magic that can be created through photo editing is amazing and that skill is worthy of learning well to promote our jewelry!
Great humorous post, thank you.
Great post thanks!
Thank you so much for the great post!
brilliant post - and great tips - thank you!
Great follow up with the editing software. Thanks for sharing your tips.
Very interesting and informative post, Sue.
I love how that spool of wire and the discs magically morphed into those beautiful earrings!
Fabulous, fun and interesting post
Great post, Sue. Fun too :)
Great information. Thank you.
Post a Comment